Thanks to the limited computing time of Overleaf, and its often shutdown, I decided to build my own Overleaf using the ShareLatex docker image which is a open-source version of Overleaf published by Overleaf.
Attention: I only test this guide on Ubuntu and WLS 2 and not sure if it works on other systems.
Prerequisites: Docker and Docker Compose
I assume you have installed Docker and Docker Compose on your system. You can refer to the official Docker documentation for installation instructions.
Btw, if you are in China, you may need to set up a proxy for Docker to pull images from Docker Hub or change the source to a mirror.

Overleaf Toolkit
Overleaf provides a toolkit to set up your own Overleaf instance. We can find the toolkit in the Overleaf Toolkit GitHub repository. It contains various scripts and configurations to help us set up Overleaf instance easily.
git clone https://github.com/overleaf/toolkitIf git is not installed on the system, you can download the repository as a ZIP file from the GitHub page and extract it.
Install ShareLatex
cd toolkit
./bin/init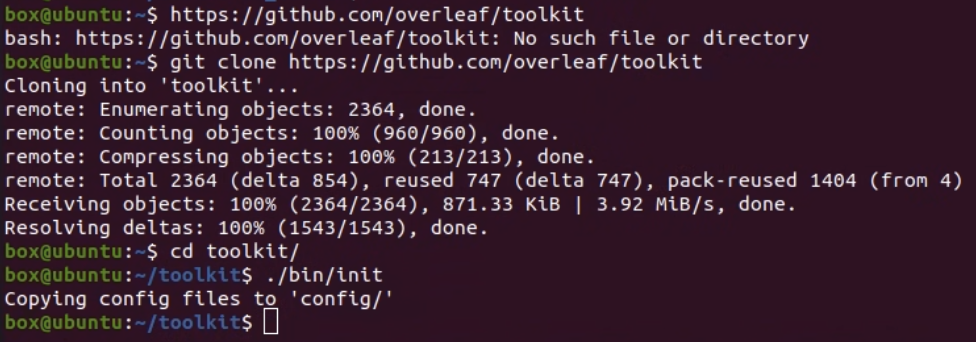
The init script will create overleaf.rc,variables.env and version files in config directory.
Now, we can start the ShareLatex instance.
sudo ./bin/up After the stuff above appears, we can open browser and visit
 http://localhost/launchpad to access Overleaf instance.
Attention: If you change OVERLEAF_SITE_URL in config/variables.env, you may need to access the launchpad page via {OVERLEAF_SITE_URL}/launchpad

It time to set up the admin account and login.
If you set up your email server in config/variables.env, you can now send the test mail to check if it works.
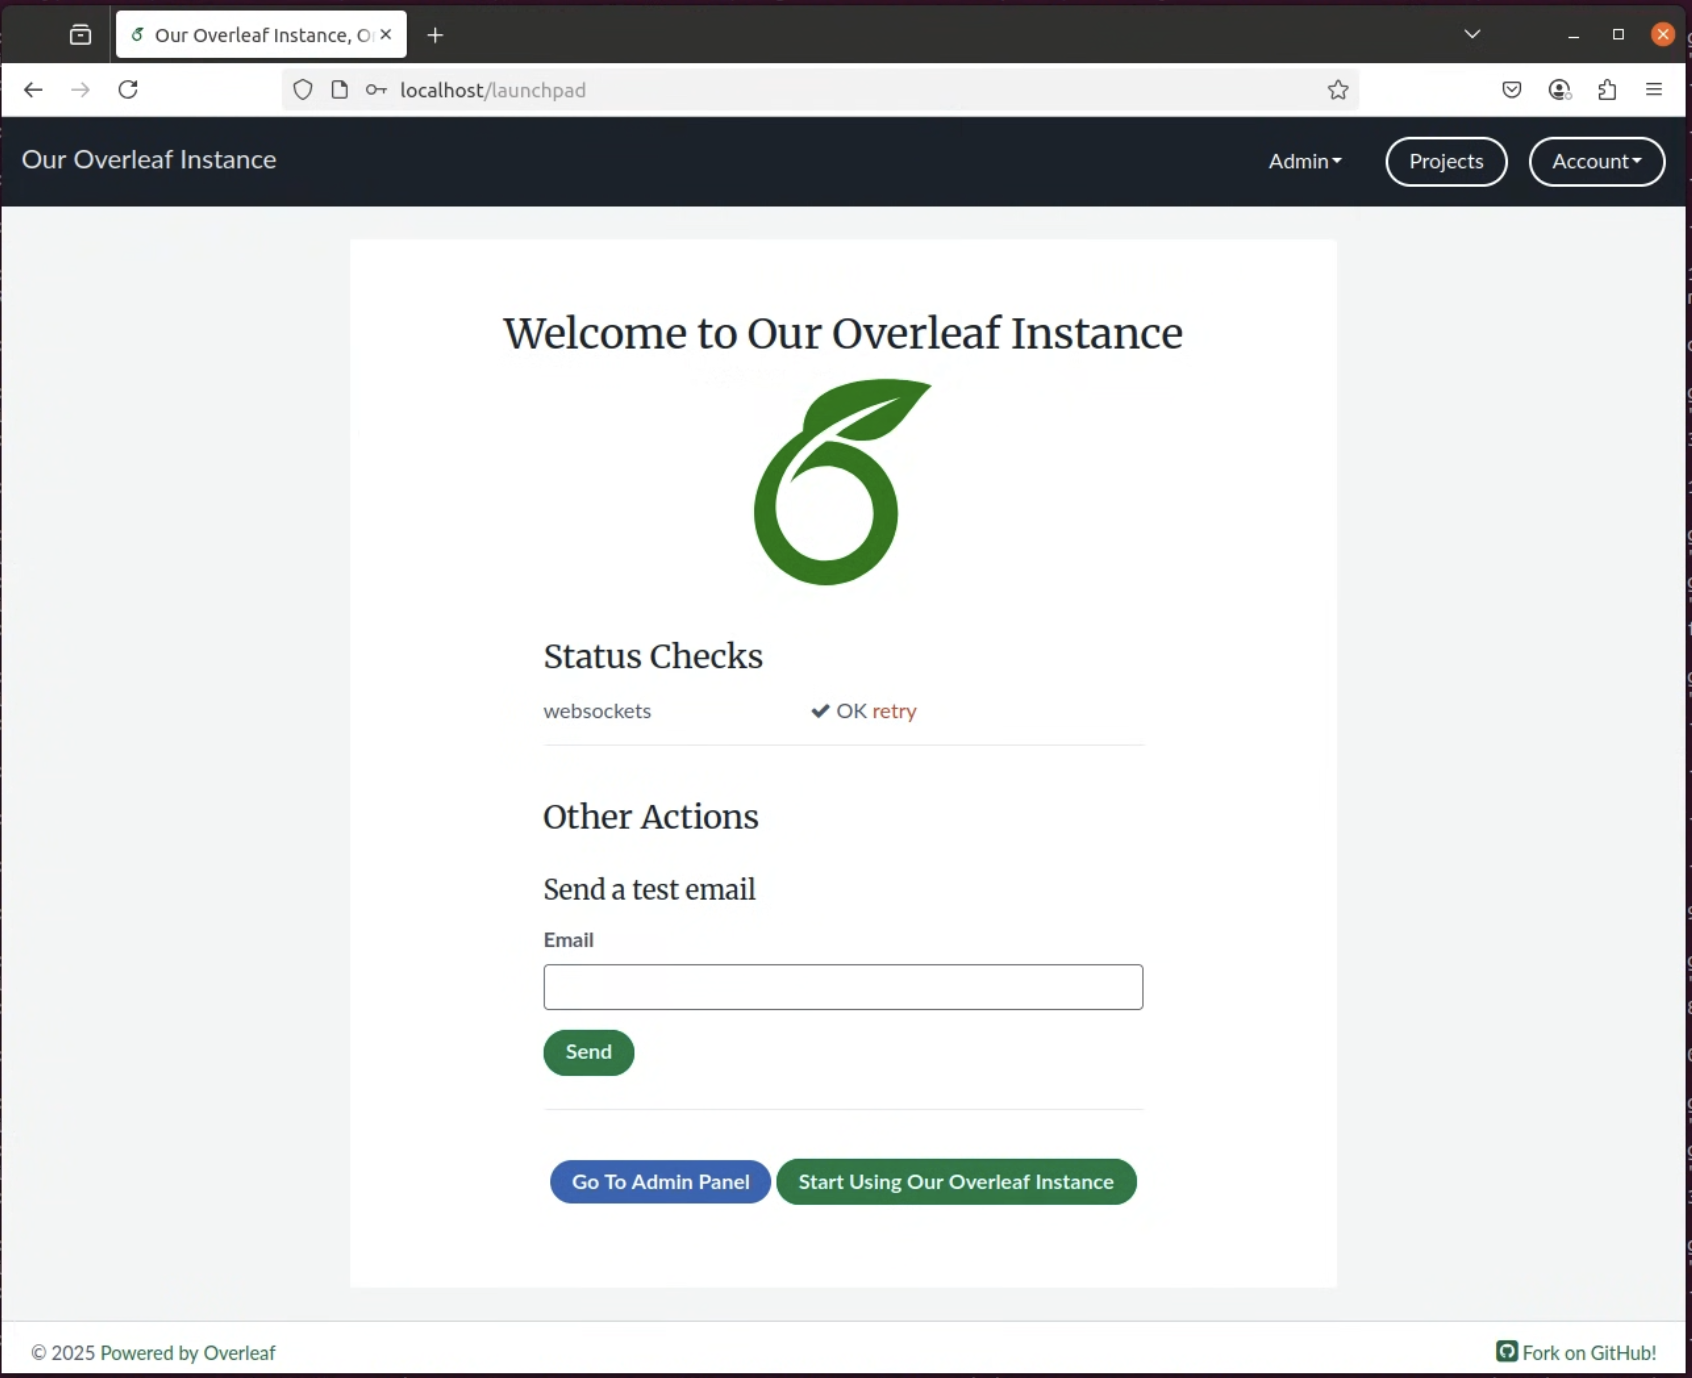
You have successfully set up your Overleaf instance!
Update ShareLatex
Update by installing in container
Attention: Updating the container may cost a lot of time, depends on your network speed and system performance. If you do not want to wait, you can try to update the container image instead in next section.
Use ./bin/shell to enter the container shell:
./bin/shellThen, run the following command to update ShareLatex:
tlmgr install scheme-fullIf tlmgr version is too old, you may need to update it first:
tlmgr update --selfIf you face the issue that ...Cross release updates are only supported with update-tlmgr-latest(.sh/.exe) --update..., you can try to run the following command:
wget https://mirror.ctan.org/systems/texlive/tlnet/update-tlmgr-latest.sh
sh update-tlmgr-latest.sh -- --upgrade
tlmgr update --self
If their are some packages that cannot be updated, you can try to run the following command:
tlmgr update --allAfter the update is complete, save the container as new image:
docker commit sharelatex sharelatex/sharelatex:with-texlive-fullThen, update config/overleaf.rc to use the new image to make sure the new image is used when you restart the container.:
# Uncomment the following line in config/overleaf.rc
OVERLEAF_DOCKER_IMAGE=sharelatex/sharelatex:with-texlive-full
Change the hostname and port
If you want to change the hostname and port of your Overleaf instance, you can modify the OVERLEAF_SITE_URL in config/overleaf.rc file. For example, if you want to change the hostname to overleaf.example.com and port to 8080, you can set it as follows:
In the config/overleaf.rc file, find the following line:
OVERLEAF_PORT=8080In the variables.env file, find the following line:
# Uncomment the following line
OVERLEAF_SITE_URL=http://overleaf.example.com